


TypeScript Utility Types Thực Chiến: Partial, Pick, Omit, Record, Readonly
Khi mới học TypeScript, nhiều developer thường gặp tình huống như sau:
function updateUser(data: any) {
  // update user profile
}
Code chạy được. Nhưng vấn đề là TypeScript gần như không còn giúp bạn kiểm tra gì nữa.
Bạn có thể truyền sai field, sai kiểu dữ liệu, thậm chí truyền cả những field không nên cho phép update.
Đây là lúc TypeScript Utility Types trở nên cực kỳ hữu ích.
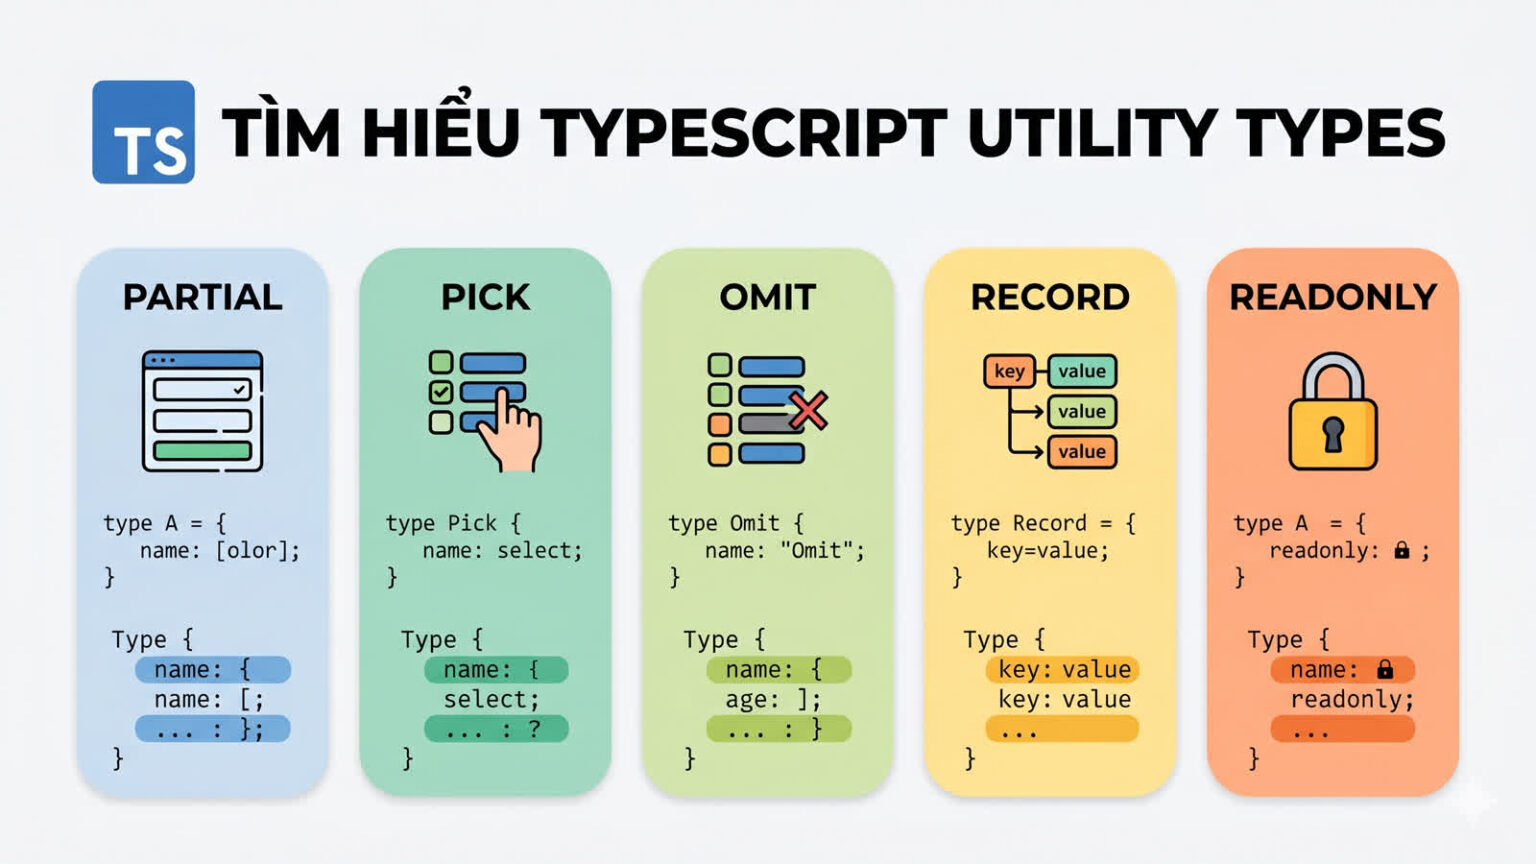
Thay vì viết lại nhiều interface gần giống nhau hoặc dùng any cho nhanh, bạn có thể dùng các Utility Types như Partial<T>, Pick<T, K>, Omit<T, K>, Record<K, T> và Readonly<T> để tái sử dụng type có sẵn một cách an toàn hơn.
Theo tài liệu chính thức của TypeScript, Utility Types là các type dựng sẵn giúp thực hiện những phép biến đổi type thường gặp và có sẵn ở phạm vi global. typescriptlang.org
Các ví dụ trong bài phù hợp nhất khi project TypeScript của bạn bật strict: true trong tsconfig.json.
Utility Types là gì?
Utility Types là các type helper có sẵn trong TypeScript, dùng để biến đổi một type hoặc interface hiện có thành một type mới.
Ví dụ, bạn có interface User:
interface User {
  id: string;
  email: string;
  name: string;
  avatarUrl?: string;
  passwordHash: string;
  createdAt: Date;
  updatedAt: Date;
}
Trong dự án thực tế, bạn hiếm khi dùng nguyên vẹn User cho mọi nơi.
Bạn có thể cần:
- Type cho form cập nhật profile, nơi user chỉ gửi một vài field.
- Type cho API response, nơi không được trả về
passwordHash. - Type cho danh sách user rút gọn, chỉ cần
id,name,avatarUrl. - Type cho config map, permission map hoặc dictionary.
Cách làm thủ công thường là tạo thêm nhiều interface:
interface UpdateUserProfileInput {
  name?: string;
  avatarUrl?: string;
}

interface UserResponse {
  id: string;
  email: string;
  name: string;
  avatarUrl?: string;
  createdAt: Date;
  updatedAt: Date;
}
Cách này không sai, nhưng dễ phát sinh vấn đề:
- Lặp lại code type.
- Dễ lệch type khi interface gốc thay đổi.
- Khó bảo trì khi model lớn dần.
- Developer dễ chọn
anyđể “đỡ phải nghĩ”.
Utility Types giúp bạn tạo type mới dựa trên type gốc mà vẫn giữ được type-safety.
Ví dụ:
type UpdateUserProfileInput = Partial<Pick<User, "name" | "avatarUrl">>;
Dòng trên có nghĩa là:
- Lấy từ
Userhai fieldnamevàavatarUrl. - Biến chúng thành optional.
- Tạo ra type dùng cho input cập nhật profile.
Không cần any. Không cần viết lại toàn bộ interface.
Tóm tắt nhanh các Utility Types hay dùng
| Utility Type | Dùng khi nào? | Ví dụ thực tế |
|---|---|---|
Partial<T> |
Biến tất cả properties thành optional | Update một phần user profile |
Pick<T, K> |
Chỉ lấy một số field từ type gốc | Tạo props cho component |
Omit<T, K> |
Loại bỏ một số field khỏi type gốc | Tạo API response không có passwordHash |
Record<K, T> |
Tạo object type-safe theo bộ key cố định | Permission map, feature flag config |
Readonly<T> |
Không cho gán lại property ở compile-time | App settings, constant config |
1. Partial – Khi mọi field là tùy chọn
Partial<T> tạo ra một type mới trong đó tất cả properties của T đều trở thành optional.
Theo tài liệu TypeScript, Partial<Type> tạo một type với toàn bộ properties của Type được đặt thành optional. typescriptlang.org
Bài toán thực tế: Update User Profile
Giả sử bạn có type sau:
interface UserProfile {
  id: string;
  name: string;
  bio: string;
  avatarUrl: string;
  location: string;
}
Khi tạo user profile mới, bạn có thể bắt buộc đủ field. Nhưng khi cập nhật, user chỉ có thể đổi một vài field, ví dụ chỉ đổi bio.
Nếu không dùng Utility Type, bạn có thể viết:
interface UpdateUserProfileInput {
  name?: string;
  bio?: string;
  avatarUrl?: string;
  location?: string;
}
Cách này chạy được, nhưng bạn đang lặp lại gần như toàn bộ UserProfile.
Với Partial<T>:
type UpdateUserProfileInput = Partial<UserProfile>;
Type này tương đương với:
type UpdateUserProfileInput = {
  id?: string;
  name?: string;
  bio?: string;
  avatarUrl?: string;
  location?: string;
};
Tuy nhiên, có một vấn đề: id cũng bị optional và có thể được gửi lên trong payload update. Trong nhiều hệ thống, id không nên nằm trong body update.
Vì vậy, cách tốt hơn là kết hợp Partial với Pick.
type EditableUserProfileFields = Pick<
  UserProfile,
  "name" | "bio" | "avatarUrl" | "location"
>;

type UpdateUserProfileInput = Partial<EditableUserProfileFields>;
Hoặc viết gọn hơn:
type UpdateUserProfileInput = Partial<
  Pick<UserProfile, "name" | "bio" | "avatarUrl" | "location">
>;
Áp dụng vào function update
interface UserProfile {
  id: string;
  name: string;
  bio: string;
  avatarUrl: string;
  location: string;
}

type UpdateUserProfileInput = Partial<
  Pick<UserProfile, "name" | "bio" | "avatarUrl" | "location">
>;

function updateUserProfile(
  userId: string,
  data: UpdateUserProfileInput
): void {
  console.log("Updating user:", userId);
  console.log("Payload:", data);
}

updateUserProfile("user_123", {
  bio: "Frontend Developer learning TypeScript",
});

updateUserProfile("user_123", {
  name: "An",
  location: "Ho Chi Minh City",
});
Code trên cho phép bạn update một phần profile mà vẫn giữ type-safety.
Nếu truyền sai field:
updateUserProfile("user_123", {
  password: "123456",
});
TypeScript sẽ báo lỗi vì password không tồn tại trong UpdateUserProfileInput.
Khi nào nên dùng Partial?
Dùng Partial<T> khi:
- Viết hàm update dữ liệu.
- Làm form cho phép sửa từng phần.
- Merge config mặc định với config người dùng.
- Viết test mock object không cần đầy đủ field.
Ví dụ với config:
interface AppConfig {
  apiBaseUrl: string;
  timeout: number;
  enableLogging: boolean;
}

const defaultConfig: AppConfig = {
  apiBaseUrl: "https://api.example.com",
  timeout: 5000,
  enableLogging: false,
};

function createConfig(overrides: Partial<AppConfig>): AppConfig {
  return {
    ...defaultConfig,
    ...overrides,
  };
}

const config = createConfig({
  enableLogging: true,
});
Ở đây, người dùng chỉ cần truyền những field muốn override.
Lưu ý khi dùng Partial
Không nên viết quá rộng như thế này:
type UpdateUserInput = Partial<UserEntity>;
nếu UserEntity có các field như:
id: string;
passwordHash: string;
role: "admin" | "user";
createdAt: Date;
Vì điều này khiến input update có thể chứa những field không nên update.
Tốt hơn:
type UpdateUserInput = Partial<
  Pick<UserEntity, "name" | "bio" | "avatarUrl">
>;
2. Pick – Chỉ lấy những field cần thiết
Pick<T, K> tạo ra một type mới bằng cách chọn một tập property từ type gốc.
Theo tài liệu TypeScript, Pick<Type, Keys> tạo type bằng cách chọn các property Keys từ Type. typescriptlang.org
Giả sử bạn có UserEntity:
interface UserEntity {
  id: string;
  email: string;
  name: string;
  avatarUrl?: string;
  passwordHash: string;
  role: "admin" | "user";
  createdAt: Date;
  updatedAt: Date;
}
Ở màn hình danh sách user, bạn chỉ cần hiển thị:
idnameavatarUrl
Bạn có thể tạo type như sau:
type UserListItem = Pick<UserEntity, "id" | "name" | "avatarUrl">;
Sử dụng trong function:
function renderUserListItem(user: UserListItem): string {
  return `${user.name} (${user.avatarUrl ?? "no avatar"})`;
}

const user: UserListItem = {
  id: "user_1",
  name: "An",
  avatarUrl: "https://example.com/avatar.png",
};

renderUserListItem(user);
Nếu bạn cố truy cập email:
function renderUserListItem(user: UserListItem): string {
  return user.email;
}
TypeScript sẽ báo lỗi vì email không tồn tại trong UserListItem.
Pick rất hữu ích cho View Model
Trong nhiều dự án frontend, bạn không nên truyền toàn bộ entity xuống component nếu component chỉ cần vài field.
Thay vì:
function UserCard(props: { user: UserEntity }) {
  return props.user.name;
}
Bạn có thể viết:
type UserCardData = Pick<UserEntity, "id" | "name" | "avatarUrl">;

function UserCard(props: { user: UserCardData }) {
  return props.user.name;
}
Lợi ích:
- Component ít phụ thuộc vào model lớn.
- Dễ test hơn.
- Giảm nguy cơ dùng nhầm field nhạy cảm.
- Type thể hiện rõ component thật sự cần gì.
Lỗi thường gặp khi dùng Pick
Một lỗi phổ biến là lạm dụng Pick để “vá” một interface quá lớn.
Ví dụ:
type UserForHeader = Pick<UserEntity, "id" | "name">;

type UserForSidebar = Pick<
  UserEntity,
  "id" | "name" | "avatarUrl"
>;

type UserForAdminTable = Pick<
  UserEntity,
  "id" | "email" | "name" | "role" | "createdAt"
>;

type UserForAuditLog = Pick<
  UserEntity,
  "id" | "email" | "role" | "updatedAt"
>;
Nếu bạn phải Pick từ cùng một interface ở quá nhiều nơi, có thể UserEntity đang trở thành God Interface.
Cách xử lý không phải là ngừng dùng Pick, mà là xem lại thiết kế type:
interface UserIdentity {
  id: string;
  email: string;
}

interface UserProfile {
  name: string;
  avatarUrl?: string;
}

interface UserAuditInfo {
  createdAt: Date;
  updatedAt: Date;
}

interface UserEntity extends UserIdentity, UserProfile, UserAuditInfo {
  passwordHash: string;
  role: "admin" | "user";
}
Sau đó, bạn có thể dùng các type nhỏ hơn thay vì lúc nào cũng Pick từ một type khổng lồ.
3. Omit – Loại bỏ field không cần thiết
Omit<T, K> tạo ra một type mới bằng cách lấy T nhưng loại bỏ một số property trong K.
Theo tài liệu chính thức, Omit<Type, Keys> tạo type bằng cách chọn tất cả properties từ Type rồi loại bỏ Keys. typescriptlang.org
Bài toán thực tế: Ẩn thông tin nhạy cảm
Giả sử database entity của bạn có field passwordHash:
interface UserEntity {
  id: string;
  email: string;
  name: string;
  passwordHash: string;
  role: "admin" | "user";
  createdAt: Date;
  updatedAt: Date;
}
Bạn không bao giờ muốn trả passwordHash về client.
Thay vì viết lại interface response:
interface UserResponse {
  id: string;
  email: string;
  name: string;
  role: "admin" | "user";
  createdAt: Date;
  updatedAt: Date;
}
Bạn có thể dùng Omit:
type UserResponse = Omit<UserEntity, "passwordHash">;
Sử dụng trong function:
interface UserEntity {
  id: string;
  email: string;
  name: string;
  passwordHash: string;
  role: "admin" | "user";
  createdAt: Date;
  updatedAt: Date;
}

type UserResponse = Omit<UserEntity, "passwordHash">;

function toUserResponse(user: UserEntity): UserResponse {
  const { passwordHash, ...safeUser } = user;
  return safeUser;
}

const userFromDb: UserEntity = {
  id: "user_123",
  email: "an@example.com",
  name: "An",
  passwordHash: "hashed_password_value",
  role: "user",
  createdAt: new Date(),
  updatedAt: new Date(),
};

const response = toUserResponse(userFromDb);
response sẽ có đầy đủ thông tin cần thiết, nhưng không có passwordHash.
Omit không tự xóa dữ liệu ở runtime
Đây là điểm cực kỳ quan trọng.
Omit<UserEntity, "passwordHash"> chỉ thay đổi type ở compile-time. Nó không tự động xóa field passwordHash khỏi object thật ở runtime.
Ví dụ sau là nguy hiểm:
function unsafeToUserResponse(user: UserEntity): UserResponse {
  return user;
}
TypeScript có thể cho phép object UserEntity được dùng như UserResponse vì TypeScript dùng structural typing. Nói đơn giản, một object có nhiều field hơn vẫn có thể tương thích với type yêu cầu ít field hơn trong nhiều ngữ cảnh.
Nhưng ở runtime, object vẫn còn passwordHash.
Cách đúng là phải thật sự loại bỏ field:
function toUserResponse(user: UserEntity): UserResponse {
  const { passwordHash, ...safeUser } = user;
  return safeUser;
}
Đây là khác biệt quan trọng giữa type-level safety và runtime behavior.
Khi nào nên dùng Omit?
Dùng Omit<T, K> khi:
- Tạo API response từ database entity.
- Tạo input type nhưng loại bỏ field do server tự sinh.
- Tạo type cho form nhưng bỏ các field readonly.
- Loại bỏ một vài field không cần thiết trong type nội bộ.
Ví dụ tạo input khi create user:
interface UserEntity {
  id: string;
  email: string;
  name: string;
  passwordHash: string;
  createdAt: Date;
  updatedAt: Date;
}

type CreateUserInput = Omit<
  UserEntity,
  "id" | "passwordHash" | "createdAt" | "updatedAt"
>;
Tuy nhiên, với password, bạn có thể cần một input riêng rõ nghĩa hơn:
interface CreateUserInput {
  email: string;
  name: string;
  password: string;
}
Không phải lúc nào Utility Types cũng là lựa chọn tốt nhất. Nếu domain meaning thay đổi, hãy tạo type riêng.
4. Record – Quản lý dictionary hiệu quả
Record<K, T> tạo một object type với key là K và value là T.
Theo tài liệu chính thức, Record<Keys, Type> tạo type object có các property key là Keys và giá trị là Type. typescriptlang.org
Ví dụ:
type UserRole = "admin" | "editor" | "viewer";

type RoleLabelMap = Record<UserRole, string>;

const roleLabels: RoleLabelMap = {
  admin: "Administrator",
  editor: "Editor",
  viewer: "Viewer",
};
Nếu thiếu một key:
const roleLabels: RoleLabelMap = {
  admin: "Administrator",
  editor: "Editor",
};
TypeScript sẽ báo lỗi vì thiếu viewer.
Nếu thêm key không hợp lệ:
const roleLabels: RoleLabelMap = {
  admin: "Administrator",
  editor: "Editor",
  viewer: "Viewer",
  owner: "Owner",
};
TypeScript cũng báo lỗi vì owner không nằm trong UserRole.
Dùng Record cho permission map
type Permission = "read" | "write" | "delete";
type UserRole = "admin" | "editor" | "viewer";

type PermissionMap = Record<UserRole, Permission[]>;

const permissions: PermissionMap = {
  admin: ["read", "write", "delete"],
  editor: ["read", "write"],
  viewer: ["read"],
};

function can(role: UserRole, permission: Permission): boolean {
  return permissions[role].includes(permission);
}

can("admin", "delete"); // true
can("viewer", "write"); // false
Cách viết này tốt hơn object thường vì TypeScript đảm bảo bạn không bỏ sót role nào.
Record với object value
type FeatureFlag = "newDashboard" | "betaEditor" | "darkMode";

interface FeatureConfig {
  enabled: boolean;
  rolloutPercentage: number;
}

type FeatureFlagConfig = Record<FeatureFlag, FeatureConfig>;

const featureFlags: FeatureFlagConfig = {
  newDashboard: {
    enabled: true,
    rolloutPercentage: 50,
  },
  betaEditor: {
    enabled: false,
    rolloutPercentage: 0,
  },
  darkMode: {
    enabled: true,
    rolloutPercentage: 100,
  },
};
Đây là pattern rất phổ biến khi bạn cần config theo key cố định.
5. Readonly – Hạn chế chỉnh sửa dữ liệu ngoài ý muốn
Readonly<T> tạo ra type mới với tất cả properties của T được đánh dấu readonly.
Theo tài liệu chính thức, Readonly<Type> tạo type với tất cả properties của Type được đặt thành readonly, nghĩa là không thể gán lại sau khi được tạo. typescriptlang.org
Ví dụ:
interface AppSettings {
  apiBaseUrl: string;
  maxRetry: number;
  enableDebug: boolean;
}

const settings: Readonly<AppSettings> = {
  apiBaseUrl: "https://api.example.com",
  maxRetry: 3,
  enableDebug: false,
};

settings.maxRetry = 5;
Dòng gán settings.maxRetry = 5 sẽ bị TypeScript báo lỗi.
Readonly không đồng nghĩa với immutable runtime
Tương tự Omit, Readonly<T> chủ yếu bảo vệ ở compile-time. Nó không tự động đóng băng object ở runtime như Object.freeze.
Ví dụ:
const settings: Readonly<AppSettings> = {
  apiBaseUrl: "https://api.example.com",
  maxRetry: 3,
  enableDebug: false,
};
TypeScript không cho bạn gán lại property trực tiếp, nhưng nếu object bị mutate bởi JavaScript thuần hoặc bị ép kiểu, runtime vẫn có thể thay đổi.
Nếu cần immutable thật ở runtime, bạn cần cơ chế khác như Object.freeze, immutable data structure, hoặc quy ước quản lý state rõ ràng.
Readonly là shallow readonly
Một điểm khác cần nhớ: Readonly<T> chỉ là shallow readonly.
Nó chặn việc gán lại property cấp đầu tiên, nhưng không tự động biến object lồng bên trong thành readonly.
Ví dụ:
interface Config {
  api: {
    timeout: number;
  };
}

const config: Readonly<Config> = {
  api: {
    timeout: 5000,
  },
};

config.api.timeout = 3000;
Trong ví dụ trên, config.api.timeout = 3000 vẫn có thể hợp lệ vì Readonly<Config> chỉ đánh dấu api là readonly ở cấp đầu tiên. Nó không tự động làm timeout bên trong api thành readonly.
Nếu bạn cần deep immutable, hãy cân nhắc custom DeepReadonly, thư viện hỗ trợ immutable data, hoặc runtime strategy phù hợp.
Kết hợp Utility Types để giải bài toán thực tế
Sức mạnh thật sự của TypeScript Utility Types không nằm ở việc dùng từng type riêng lẻ, mà ở khả năng kết hợp chúng.
Ví dụ: Update User Profile an toàn hơn
Giả sử database entity:
interface UserEntity {
  id: string;
  email: string;
  name: string;
  bio: string;
  avatarUrl?: string;
  passwordHash: string;
  role: "admin" | "user";
  createdAt: Date;
  updatedAt: Date;
}
Yêu cầu:
- User chỉ được update
name,bio,avatarUrl. - Các field update đều optional.
- Không cho update
id,email,role,passwordHash,createdAt,updatedAt.
Ta có thể viết:
type EditableUserFields = Pick<
  UserEntity,
  "name" | "bio" | "avatarUrl"
>;

type UpdateUserProfileInput = Partial<EditableUserFields>;
Hoặc viết trực tiếp:
type UpdateUserProfileInput = Partial<
  Pick<UserEntity, "name" | "bio" | "avatarUrl">
>;
Áp dụng vào service:
interface UserEntity {
  id: string;
  email: string;
  name: string;
  bio: string;
  avatarUrl?: string;
  passwordHash: string;
  role: "admin" | "user";
  createdAt: Date;
  updatedAt: Date;
}

type UpdateUserProfileInput = Partial<
  Pick<UserEntity, "name" | "bio" | "avatarUrl">
>;

async function updateUserProfile(
  userId: string,
  input: UpdateUserProfileInput
): Promise<void> {
  if (Object.keys(input).length === 0) {
    throw new Error("No fields to update");
  }

  console.log(`Updating user ${userId}`, input);

  // await userRepository.update(userId, input);
}
Code này có nhiều điểm tốt:
- Không dùng
any. - Không cho update field nhạy cảm.
- Cho phép update từng phần.
- Type được suy ra từ
UserEntity, giảm trùng lặp. - Dễ đọc vì type thể hiện đúng nghiệp vụ.
Đặt tên type trung gian để dễ đọc
Đây là code hợp lệ:
type UpdateUserProfileInput = Partial<
  Pick<UserEntity, "name" | "bio" | "avatarUrl">
>;
Nhưng nếu type phức tạp hơn, bạn nên tách ra:
type EditableUserProfileFields = Pick<
  UserEntity,
  "name" | "bio" | "avatarUrl"
>;

type UpdateUserProfileInput = Partial<EditableUserProfileFields>;
Cách này giúp code dễ hiểu hơn, đặc biệt khi review pull request.
Pick vs Omit: Nên dùng cái nào?
Pick và Omit đều tạo type mới từ type cũ, nhưng tư duy sử dụng khác nhau.
Dùng Pick khi bạn muốn whitelist field
Ví dụ component chỉ cần một số field:
type UserCardData = Pick<UserEntity, "id" | "name" | "avatarUrl">;
Ở đây bạn chủ động nói: “Tôi chỉ cần những field này.”
Pick phù hợp khi:
- Số field cần lấy ít.
- Bạn muốn giới hạn dữ liệu rõ ràng.
- Bạn thiết kế input/output theo hướng whitelist.
- Bạn muốn component hoặc function ít phụ thuộc vào type lớn.
Dùng Omit khi bạn muốn blacklist field
Ví dụ API response giống entity, chỉ cần bỏ passwordHash:
type UserResponse = Omit<UserEntity, "passwordHash">;
Omit phù hợp khi:
- Type mới gần giống type gốc.
- Chỉ cần loại bỏ một vài field.
- Bạn muốn tránh lặp lại nhiều property.
- Type được dùng nội bộ và rủi ro lộ dữ liệu thấp.
Cẩn thận với Omit trong API public
Nếu UserEntity sau này thêm field nhạy cảm mới, ví dụ:
interface UserEntity {
  id: string;
  email: string;
  name: string;
  passwordHash: string;
  twoFactorSecret: string;
}
Type này:
type UserResponse = Omit<UserEntity, "passwordHash">;
vẫn sẽ để lọt twoFactorSecret.
Vì vậy, với API public hoặc dữ liệu nhạy cảm, Pick thường an toàn hơn:
type UserResponse = Pick<UserEntity, "id" | "email" | "name">;
Rule of thumb:
| Tình huống | Nên dùng |
|---|---|
| API public hoặc dữ liệu nhạy cảm | Pick |
| Component chỉ cần vài field | Pick |
| Type mới gần giống type gốc và chỉ bỏ 1-2 field | Omit |
| Blacklist ngày càng dài | Xem lại thiết kế type |
Utility Types và Generic Types có liên quan gì?
Hầu hết Utility Types đều được xây dựng dựa trên Generic Types.
Ví dụ:
type UpdateUserProfileInput = Partial<UserProfile>;
Ở đây Partial nhận UserProfile như một type parameter.
Bạn có thể hiểu nôm na:
Partial<T>
Pick<T, K>
Omit<T, K>
Record<K, T>
Readonly<T>
Tất cả đều nhận type đầu vào và trả về type mới.
Ví dụ với Record<K, T>:
type Status = "idle" | "loading" | "success" | "error";

type StatusMessage = Record<Status, string>;
Trong đó:
Klà union các key:"idle" | "loading" | "success" | "error".Tlà kiểu value:string.
Kết quả:
type StatusMessage = {
  idle: string;
  loading: string;
  success: string;
  error: string;
};
Một số Utility Types khác nên biết
Ngoài Partial, Pick, Omit, Record và Readonly, TypeScript còn cung cấp nhiều utility khác như:
Required<T>ReturnType<T>Parameters<T>Awaited<T>NonNullable<T>Extract<T, U>Exclude<T, U>InstanceType<T>ThisParameterType<T>OmitThisParameter<T>NoInfer<T>
Tài liệu chính thức của TypeScript liệt kê các Utility Types có sẵn global và mô tả mục đích của từng loại. typescriptlang.org
Cập nhật TypeScript 5.x: NoInfer
Từ TypeScript 5.4, TypeScript giới thiệu NoInfer<T>, một Utility Type giúp kiểm soát inference trong generic function. Theo release note chính thức, NoInfer<T> báo cho TypeScript không đào sâu vào type bên trong để tìm candidate cho type inference. typescriptlang.org
Ví dụ:
function createStreetLight<C extends string>(
  colors: C[],
  defaultColor?: NoInfer<C>
) {
  return {
    colors,
    defaultColor,
  };
}

createStreetLight(["red", "yellow", "green"], "red"); // OK
createStreetLight(["red", "yellow", "green"], "blue"); // Error
Trong ví dụ trên, C được suy luận từ mảng colors.
Nếu không có NoInfer<C>, TypeScript có thể cố dùng cả defaultColor để góp phần suy luận C, khiến type bị rộng hơn mong muốn trong một số tình huống generic nâng cao.
Với người mới học, bạn chưa cần dùng NoInfer<T> ngay. Nhưng nếu làm việc nhiều với generic function hoặc library code, đây là Utility Type đáng biết trong TypeScript 5.x.
Lỗi thường gặp khi dùng Utility Types
1. Dùng Partial quá rộng
Không nên viết:
type UpdateUserInput = Partial<UserEntity>;
nếu UserEntity có các field như:
id: string;
passwordHash: string;
role: "admin" | "user";
createdAt: Date;
Vì điều này khiến input update có thể chứa những field không nên update.
Tốt hơn:
type UpdateUserInput = Partial<
  Pick<UserEntity, "name" | "bio" | "avatarUrl">
>;
2. Nghĩ rằng Omit sẽ xóa field ở runtime
Sai:
type UserResponse = Omit<UserEntity, "passwordHash">;

function toResponse(user: UserEntity): UserResponse {
  return user;
}
Đúng:
function toResponse(user: UserEntity): UserResponse {
  const { passwordHash, ...safeUser } = user;
  return safeUser;
}
Utility Types chỉ hoạt động ở type-level. Chúng không tự thay đổi object thật khi code chạy.
3. Nghĩ rằng Readonly là deep immutable
Không nên hiểu rằng Readonly<T> sẽ khóa toàn bộ object lồng nhau.
Ví dụ:
interface Config {
  api: {
    timeout: number;
  };
}

const config: Readonly<Config> = {
  api: {
    timeout: 5000,
  },
};

config.api.timeout = 3000;
Readonly<T> chỉ readonly ở cấp đầu tiên. Nếu cần deep readonly, bạn cần cách tiếp cận khác.
4. Lạm dụng Pick thay vì chia nhỏ interface gốc
Nếu bạn có quá nhiều type kiểu:
type A = Pick<BigInterface, "field1" | "field2">;
type B = Pick<BigInterface, "field3" | "field4">;
type C = Pick<BigInterface, "field1" | "field5" | "field9">;
Có thể BigInterface đang quá phình to.
Hãy cân nhắc tách domain model thành nhiều interface nhỏ hơn:
interface UserIdentity {
  id: string;
  email: string;
}

interface UserProfile {
  name: string;
  avatarUrl?: string;
}

interface UserSecurity {
  passwordHash: string;
  twoFactorEnabled: boolean;
}
Sau đó compose lại khi cần:
type UserEntity = UserIdentity & UserProfile & UserSecurity;
5. Đặt type quá khó đọc
Không nên viết type quá dài trong một dòng:
type UpdateInput = Partial<Omit<Pick<UserEntity, "name" | "bio" | "avatarUrl" | "email">, "email">>;
Nên tách ra:
type EditableUserFields = Pick<
  UserEntity,
  "name" | "bio" | "avatarUrl"
>;

type UpdateUserProfileInput = Partial<EditableUserFields>;
Type tốt không chỉ đúng, mà còn phải dễ đọc.
Best Practices khi dùng TypeScript Utility Types
1. Ưu tiên Utility Types built-in thay vì tự viết lại
Không cần tự viết:
type MyPartial<T> = {
  [K in keyof T]?: T[K];
};
trừ khi bạn đang học mapped types hoặc cần custom behavior đặc biệt.
Trong code production, hãy ưu tiên:
type UpdateInput = Partial<User>;
Utility Types built-in đã quen thuộc với cộng đồng TypeScript, dễ hiểu khi review code, và được tài liệu chính thức hỗ trợ.
2. Đặt tên type mới rõ ràng
Không nên đặt tên chung chung:
type UserData = Partial<Pick<UserEntity, "name" | "bio">>;
Nên đặt theo mục đích sử dụng:
type UpdateUserProfileInput = Partial<
  Pick<UserEntity, "name" | "bio">
>;
Tên tốt giúp người đọc hiểu type đó dùng ở đâu.
3. Ưu tiên Pick cho dữ liệu public hoặc nhạy cảm
Với API response public, whitelist thường an toàn hơn blacklist.
Nên cân nhắc:
type PublicUserResponse = Pick<
  UserEntity,
  "id" | "name" | "avatarUrl"
>;
thay vì:
type PublicUserResponse = Omit<
  UserEntity,
  "passwordHash" | "twoFactorSecret"
>;
Nếu sau này thêm field nhạy cảm mới, Pick ít có nguy cơ để lọt dữ liệu hơn.
4. Không dùng Utility Types để che giấu domain model xấu
Utility Types giúp giảm lặp code, nhưng không thay thế thiết kế model tốt.
Nếu type của bạn quá lớn, quá nhiều field không liên quan, hoặc phải Pick/Omit liên tục, hãy xem lại cấu trúc domain.
5. TypeScript không thay thế runtime validation
TypeScript chỉ kiểm tra ở compile-time.
Nếu dữ liệu đến từ API, form, localStorage hoặc request body, bạn vẫn nên validate runtime bằng các thư viện như Zod, Valibot, Yup hoặc cơ chế validation của framework backend.
Ví dụ:
type UpdateUserProfileInput = Partial<
  Pick<UserEntity, "name" | "bio" | "avatarUrl">
>;
Type này giúp developer viết code đúng hơn, nhưng không đảm bảo request HTTP từ bên ngoài luôn hợp lệ.
Với API thực tế, bạn vẫn nên validate dữ liệu ở runtime:
import { z } from "zod";

const updateUserProfileSchema = z.object({
  name: z.string().min(1).optional(),
  bio: z.string().max(500).optional(),
  avatarUrl: z.string().url().optional(),
});

type UpdateUserProfileInput = z.infer<typeof updateUserProfileSchema>;
Cách này giúp bạn có cả runtime validation và TypeScript type inference.
Ví dụ hoàn chỉnh: User API type-safe hơn với Utility Types
Dưới đây là ví dụ tổng hợp gần với thực tế hơn.
interface UserEntity {
  id: string;
  email: string;
  name: string;
  bio: string;
  avatarUrl?: string;
  passwordHash: string;
  role: "admin" | "user";
  createdAt: Date;
  updatedAt: Date;
}

type PublicUserResponse = Pick<
  UserEntity,
  "id" | "email" | "name" | "bio" | "avatarUrl"
>;

type EditableUserProfileFields = Pick<
  UserEntity,
  "name" | "bio" | "avatarUrl"
>;

type UpdateUserProfileInput = Partial<EditableUserProfileFields>;

function toPublicUserResponse(user: UserEntity): PublicUserResponse {
  return {
    id: user.id,
    email: user.email,
    name: user.name,
    bio: user.bio,
    avatarUrl: user.avatarUrl,
  };
}

async function updateUserProfile(
  userId: string,
  input: UpdateUserProfileInput
): Promise<PublicUserResponse> {
  if (Object.keys(input).length === 0) {
    throw new Error("No fields to update");
  }

  const existingUser: UserEntity = {
    id: userId,
    email: "an@example.com",
    name: "An",
    bio: "Software Engineer",
    avatarUrl: undefined,
    passwordHash: "hashed_password",
    role: "user",
    createdAt: new Date(),
    updatedAt: new Date(),
  };

  const updatedUser: UserEntity = {
    ...existingUser,
    ...input,
    updatedAt: new Date(),
  };

  return toPublicUserResponse(updatedUser);
}
Phân tích:
PublicUserResponsedùngPickđể whitelist field được trả ra client.EditableUserProfileFieldschỉ chứa field user được sửa.UpdateUserProfileInputdùngPartialđể cho phép update từng phần.toPublicUserResponsechủ động map field, tránh lộ dữ liệu nhạy cảm.- Không dùng
any.
Đây là cách dùng Utility Types có chủ đích, thay vì dùng cho “ngắn code” một cách máy móc.
FAQ về TypeScript Utility Types
TypeScript Utility Types là gì?
TypeScript Utility Types là các type helper có sẵn, giúp biến đổi type hiện có thành type mới. Ví dụ: Partial<T> biến toàn bộ properties thành optional, còn Pick<T, K> chỉ lấy một số property từ type gốc.
Khi nào nên dùng Partial?
Bạn nên dùng Partial<T> khi cần cho phép truyền một phần dữ liệu, ví dụ update profile, override config hoặc tạo mock object trong test.
Tuy nhiên, không nên dùng Partial<UserEntity> quá rộng nếu entity có field nhạy cảm hoặc field không được phép update.
Pick và Omit khác nhau thế nào?
Pick<T, K> dùng để chọn field theo kiểu whitelist.
Omit<T, K> dùng để loại bỏ field theo kiểu blacklist.
Với API public hoặc dữ liệu nhạy cảm, Pick thường an toàn hơn vì bạn chủ động khai báo chính xác field nào được trả ra.
Readonly có làm object immutable không?
Không hoàn toàn.
Readonly<T> chỉ giúp TypeScript báo lỗi khi bạn gán lại property ở compile-time. Nó không tự động đóng băng object ở runtime và cũng chỉ readonly ở cấp đầu tiên.
Nếu cần immutable thật ở runtime, bạn cần dùng thêm cơ chế khác như Object.freeze, immutable data structure hoặc custom deep readonly strategy.
Utility Types có thay thế runtime validation không?
Không.
Utility Types chỉ kiểm tra ở compile-time. Nếu dữ liệu đến từ request body, API, form hoặc localStorage, bạn vẫn cần runtime validation bằng các thư viện như Zod, Valibot, Yup hoặc cơ chế validation của framework backend.
Kết luận
TypeScript Utility Types giúp bạn viết code gọn hơn, type-safe hơn và dễ bảo trì hơn.
Thay vì dùng any cho các tình huống như update form, API response hay config map, bạn có thể tận dụng:
Partial<T>để biến field thành optional.Pick<T, K>để lấy đúng field cần dùng.Omit<T, K>để loại bỏ field không mong muốn.Record<K, T>để tạo dictionary type-safe.Readonly<T>để hạn chế chỉnh sửa dữ liệu ngoài ý muốn.
Điểm quan trọng là đừng chỉ học thuộc định nghĩa. Hãy đặt Utility Types vào bài toán thực tế: update user profile, bảo vệ API response, thiết kế component props, quản lý permission map.
Khi dùng đúng, Utility Types không chỉ giúp bạn viết ít code hơn, mà còn giúp codebase rõ ràng hơn về mặt nghiệp vụ.